Wednesday 21 August 2013

Part four ( a straight line to curve )

What I now have is a cylinder.
I order to make it a closed shape I need to seal the ends, given that I'm using mostly hand tools I can only cut in straight lines. I mark out the shape I need by drawing the profile of the barrel directly onto the metal.


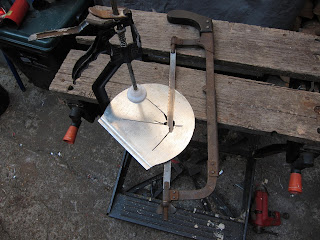
to save a little work I kept the circle as close to the pre cut edges as possible.....


And proceeded to making it into as much of a circle as possible, Just keep hacking off more and more straight bits. More sawing and more filing to take off the edges and it becomes a the disk-esqe shape needed..


And in time a pair of disks.. you can see where I've started to mark out the door on the first disk.
I took quite a lot of filing and tweaking to get a nice close fit to the cylinders sides.


I had already curved over the edges of a piece of metal to make the top plate, I kept trying it in for the fit.


Of course it still has to secured in place, where I shall be making more mistakes.
To make the hole where the door will go, here I come across another of the hacksaws limitations. I can't simply cut across the metal without ruining it, I begin by drilling big old hole to feed the saw blade through, I reassemble the saw and slowly resume the sawing.


after finally managing to get the hole resembling a square I cut diagonally into the corners, Later I bend it over ( and out) to make the door frame, removing so much metal makes it bendy, adding the frame will give back some strength.


Now to the other end, where the Exhaust pipe will be going

Tuesday 30 July 2013

Part three ( drawing on mistakes )

A little bit of rewind
I did plan how I was going to construct this, but it was only in my head.
Later I sat down and made some drawings, I needed a rough plan to follow, the trick is to not slavishly follow a plan but be flexible as you go along. Many things in a 2D drawing will not translate directly into a 3D object, materials won't always behave the way you would like and that darn 3rd dimension can  trip you up especially when you're trying to get two surfaces to meet perfectly...


Everybody makes mistakes, I will no doubt make many as I continue, it impossible to document every tiny step however if and when I mess up, I will be honest. Every failure is a stepping stone and not a brick wall, working with unfamiliar materials will always be a learning curve.
My first attempt at making a disk to seal the barrel up were less than successful.
The idea was to seal the end with a disk with curved edges riveted directly to the inside body of the barrel, a little sawing and a helluva lot of hammering, bending and sweating later, it became apparent that bending the metal in a neat useable way was going to be very , very tricky. Either beyond my skills or out of reach using the tools I have at hand.


The results were not great, I abandoned this approach in favour of  a simpler one.
Plan B: From a functional point of view all I need to do is seal the ends of the barrel, its that simple.
Armed with that information I decided on different line of attack, a better way might be to create two metal shims and affix them to the inner edge of the barrel ends and secure a flat plate against them ( no bending required) thus creating a better, neater air seal.


I mentioned before the best way to saw a cylindrical objects ( such as barrel ) is to secure it with a ratchet strap. then saw -turn ,  saw -  turn .... I recycle the chopped off base of the extinguisher to make the two metal rings I wanted.


having done this twice I now had a shim for either end.. I cut them to size and slightly bent the edges to match the horseshoe shape of the barrels outward turned edges.


Drilled and holes and matched them to holes in the barrels body.


And riveted away ..


I now need to make a pair of disks to match the profile of the barrel and sit behind the shims at either end  to created the closed barrel which one day will contain the fire.


Thursday 18 July 2013

Part two (blisters and barrels )

What I have now  is effectively a big heavy tube.

I could have left it at being a tube and found a simpler way to make the top into a usable hot plate.
An easy way is to attach two bars to either side of the cylinders top, this gives it three points of contact ( on which to place a pan ) another is to fix a flat plate directly to the top of the barrel, both these methods are well used and work well, but I wanted a more stable surface with better heat distribution. I did briefly consider hammering flat the top of the tube to give me  nice level surface, but as this is 2mm steel I decided on a less noisy route..


Sawing a tube is always pain in the proverbial.
The best way I've found is to clamp the barrel between two large bits of wood using the workbench jaws, both bits of wood are at angles to jam it firmly down onto the bench, it does keep working loose. A feature of all circular / round things is they always want to roll away, I just kept sawing, re-tightening, sawing, re-tightening.


Hacksaws and bow saws have a inbuilt design flaw.
They can only cut so deep before the saw can cut no deeper, the frame will restrict the depth you can cut. I found you can extend the cutting range a little by reducing the cutting angle as you get further and further into the cut.


Halfway there !


When it came to cutting the barrel ( this is my fourth ) experience has taught me that once the cut is right through....  the whole thing will go wobbly and generally becomes an unstable pain to deal with, the very simple solution is to leave a bit attached along your cut untill your ready to take out the final pieces. In this case I left about 5 mm uncut to keep the thing as stiff as possible until I was ready to remove the panel..


When its nearly there...
Take out the first bit of support metal.

And then, the other..


So now I've pretty much destroyed the Fire Extinguisher.
I need a way to put a flat top back onto it, I had some flat steel that I found which is just about the right size.
So to make a contact between the barrel and the top I bent the edges of the barrel to horseshoe-ish shape ..


I bent the edges with a small vice bit-by-bit, gradually teasing the curve upwards and outwards until I got it into the shape I wanted
And then tried the top on ..


I'm discovering working with metal is a slow process, with wood things happen quickly, repairs are easily dealt with and measurements can be a little less precise.
It's interesting to find out the skills needed to work a different material.. I did have sketches of how I thought this was going to be made, I'm finding that adaptation is important and necessary as the process progresses...
Errors eat huge chunks of time when working metal , I'm finding I do a lot more forward thinking...
More on making errors later.


Some adjusting still needed to do to get the metal faces tighter, but it's pretty close.!

Tuesday 16 July 2013

Burning thoughts ( an introduction )

The world of homemade wood stoves is vast.

There are as many variations on the theme as you care to imagine, I have seen them built from everything from oil barrels, gas bottles (very popular), cutlery holders, canteens, etc..etc.. the list could go on and on, but basically its a fire contained in a box (a little more complex, we'll get to that later),  the point I'm making is you're not smashing atoms or constructing an artificial heart,  naturally the box itself has to be constructed from materials that can easily withstand fire, which got me thinking.

I have for some time been wanting to attempt to built a small log burner, In fact In a lazy half assed way I have already had an attempt or two, however until recently I had not discovered a suitable vessel for the project I had in mind. Now I use the word 'discovered' because the principle of the thing is to build something for nothing, or as close to nothing as possible. I will use no specialised tools or any industrial welding / cutting kit, generally it will be hand tools and whatever I have in the toolbox. As much as possible I will be using found, recycled or scavenged materials. I'll go through the construction step-by-step as I make it, this is the beginning, how will it end.?  I don't know really know
Onwards.!

A quick note about attitudes.
I could easily have gone out and bought one, the modern tendency is to do just that, to assume everything we need has to be bought (goods or services). We quickly  rob ourselves of the opportunity to test the limits of our own abilities. Considering yourself incapable without ever trying is to deprive yourself of independence. Enough preaching, now to work...

So here's the victim...


It's an old 9 litre fire extinguisher, what can I say?... I like Irony !!

So the first step was to get the thing apart...
I removed the clamp that kept the hose very firmly attached to the body by poking a screwdriver through  pipe clamp and twisting side to side until it could be slipped down the length of the hose. Next was unscrewing the main ring that holds the whole point'n'squirt assembly together. This turned out to be annoyingly well screwed together, the solution was simple. I tipped it on its side, lined up a  big screwdriver with one of the lugs and gave it a smart whack! Two or three more and it unscrewed with ease.


Pop the handle and other innards out.... and your donor is ready for surgery !! .


 The top and bottom parts of the cylinder where very chunky, my guess is they are designed to withstand pressure.. My first point of attack was to assume the top part would be of little use. The top part made a handy ready marked out saw line for me to follow, so it was time to behead the bottle.
 A handy tip here, whenever you are sawing something cylindrical it wants to roll away. My solution was to open out the jaws of the workbench as wide as they would go, I then sat the barrel between them and wrapped a ratchet strap over the barrel and bench to stabilize the whole thing, this kept it steady whilst sawed, rotated, sawed and rotated.


Tada... Topless bottle!!
At this point I decided the base is too heavy for my purpose , So I repeat the process with the ratchet strap and workbench for the bottom part.
Make very sure you get a super straight line right round the barrel.


Leaving me with this..
The worlds smallest fire extinguisher


Thats all for part one..
This is as far as its gotten for now.